Braun Dryer Efficiency & Safety Checks March/September
Regular assessments contribute to sustained operational efficiency, reducing energy consumption and minimizing downtime through the early identification of potential issues.
Braun Dryer Efficiency & Safety Checks March/September
Regular assessments contribute to sustained operational efficiency, reducing energy consumption and minimizing downtime through the early identification of potential issues.
*** LOTO Confirmation Statement - DO NOT EDIT/REMOVE ***
All hazardous energy has been isolated using LOTO procedures?
All potential stored or residual energy has been relieved, disconnected, restrained, lowered, and/or otherwise rendered safe?
Lock Out Tag Out
Food Safety Pre-Check
LOTO Performed
Clean Lint Screen
Picture Before Cleaning
Add or drag pictures
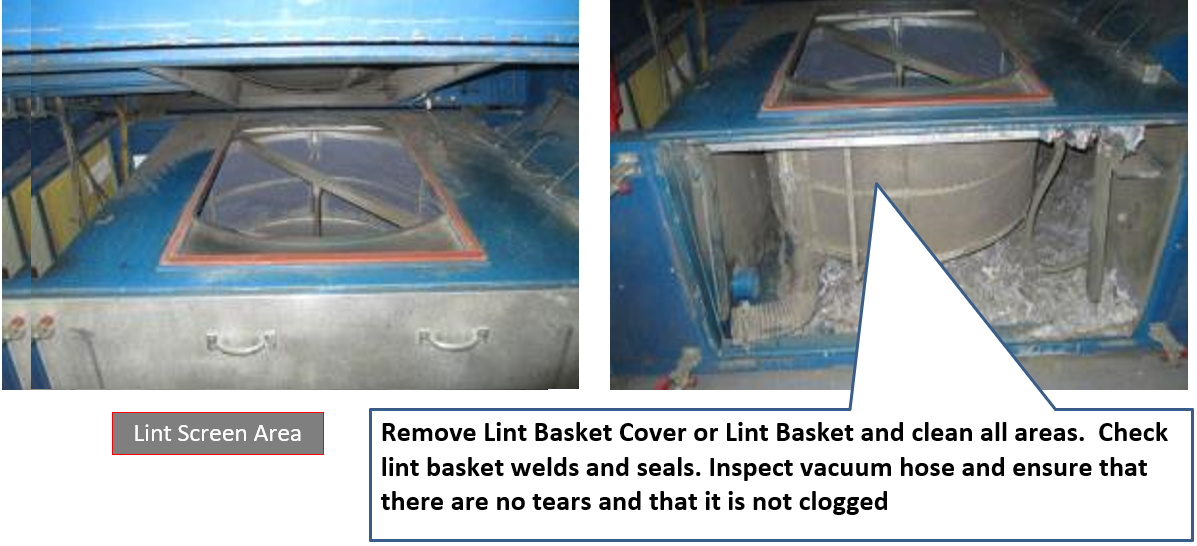
Remove Lint Basket Cover or Lint Basket and clean all areas.
Check lint basket welds and seals.
Inspect vacuum hose and ensure that there are no tears and that it is not clogged.
Picture After Cleaning
Add or drag pictures
Check lint screen
Picture Before Cleaning
Add or drag pictures
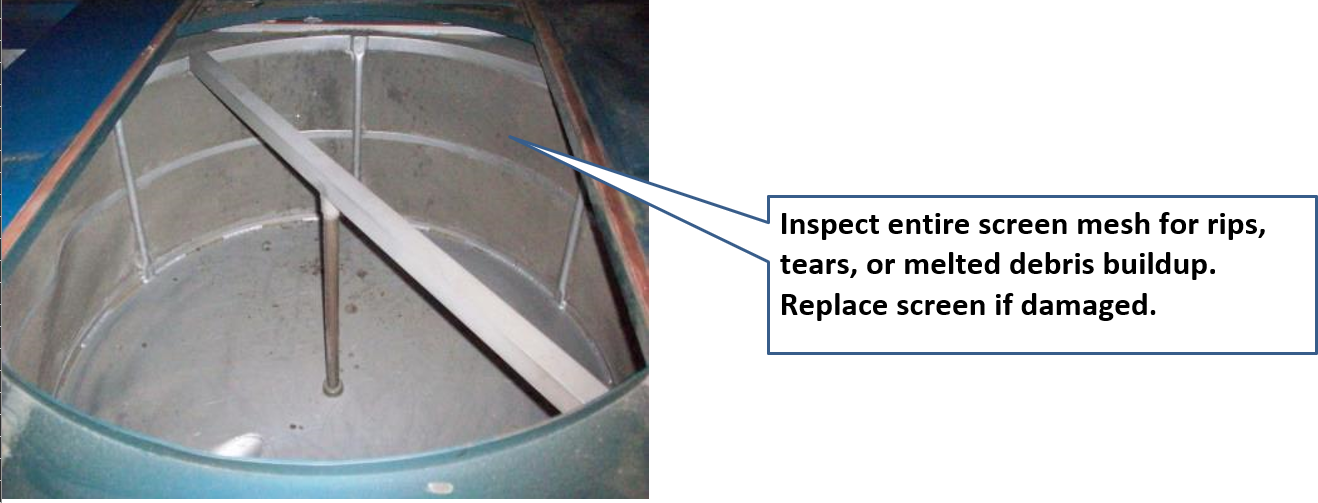
Check lint screen for rips and tears. Replace lint screen if damaged.
Inspect the lint basket screen for ‘clogging’, melted nylon, or rubber build up
Pressure wash lint screen to remove all build-up.
If it can be cleaned adequately then no replacement necessary. If it cannot be cleaned adequately it must be replaced.
Check lint screen welds and seals.
Picture After Cleaning
Add or drag pictures
Check Lint Collector and Lint Collector Vacuum Screens
Picture Before Cleaning
Add or drag pictures
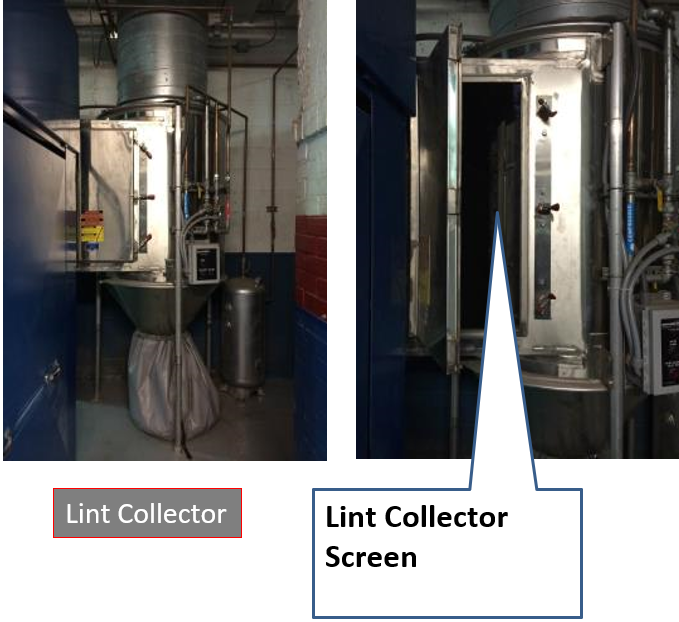
Inspect lint collector screen for rips and tears.
Inspect lint collector welds and seals.
Inspect vacuum hosing and ensure that there are no tears and that it is not clogged.
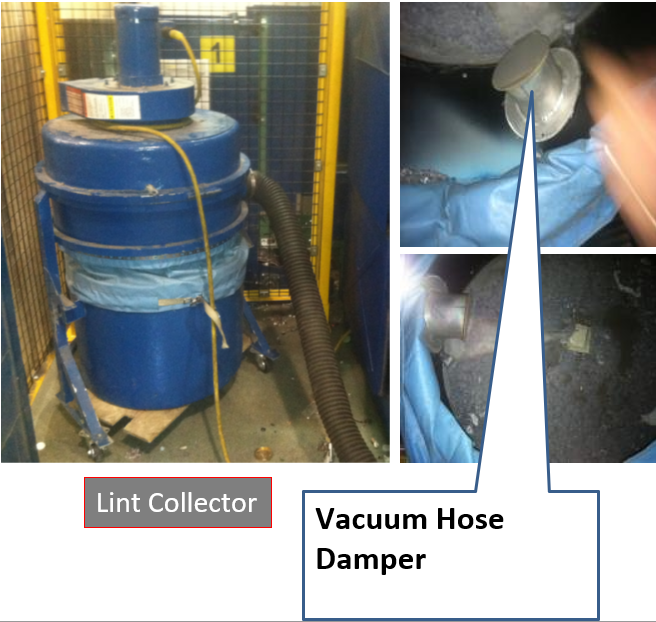
Pony wash internal lint vacuum bag or replace if necessary.
On heavy lint and oil operations, this task may be required to be completed more often. Ensure vacuums dampers have freedom of movement.
Picture After Cleaning
Add or drag pictures
Clean Lint from Right Side Tower
Picture Before Cleaning
Add or drag pictures
Vacuum lint from right side tower area.
Remove guards/covers and clean beneath.
Clean area of any oils/greases that may have accumulated on motors or ducting.
Picture After Cleaning
Add or drag pictures
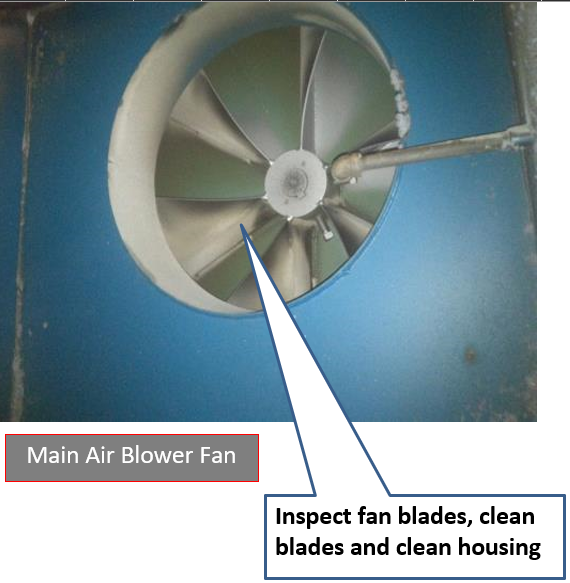
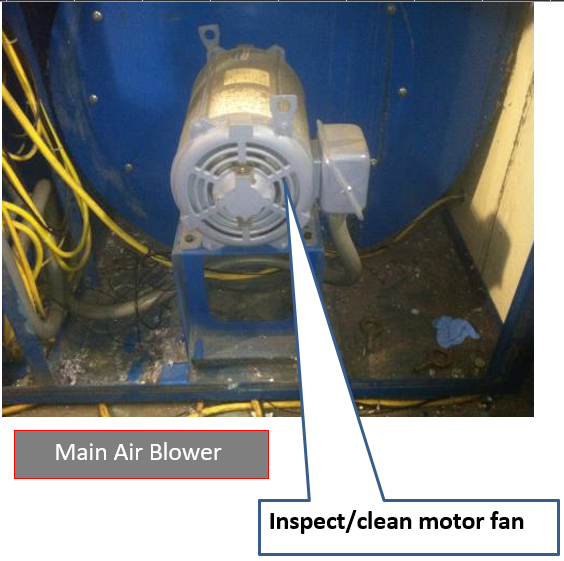
Check/Clean Main Air Blower
Picture Before Cleaning
Add or drag pictures
Remove any accumulated lint.
Inspect wheel and housing integrity.
Picture After Cleaning
Add or drag pictures
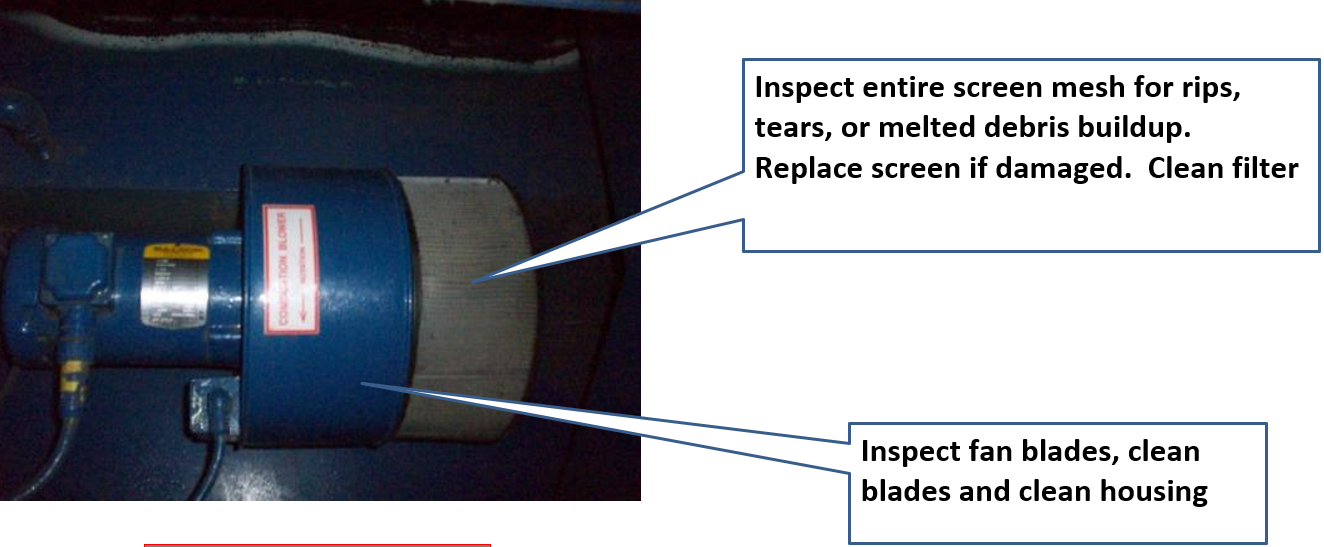
Check/Clean Combustion Blower and Filter
Picture Before Cleaning
Add or drag pictures
Remove any accumulated lint.
Inspect wheel and housing integrity.
Clean pre filter if equipped and change as necessary.
Picture After Cleaning
Add or drag pictures
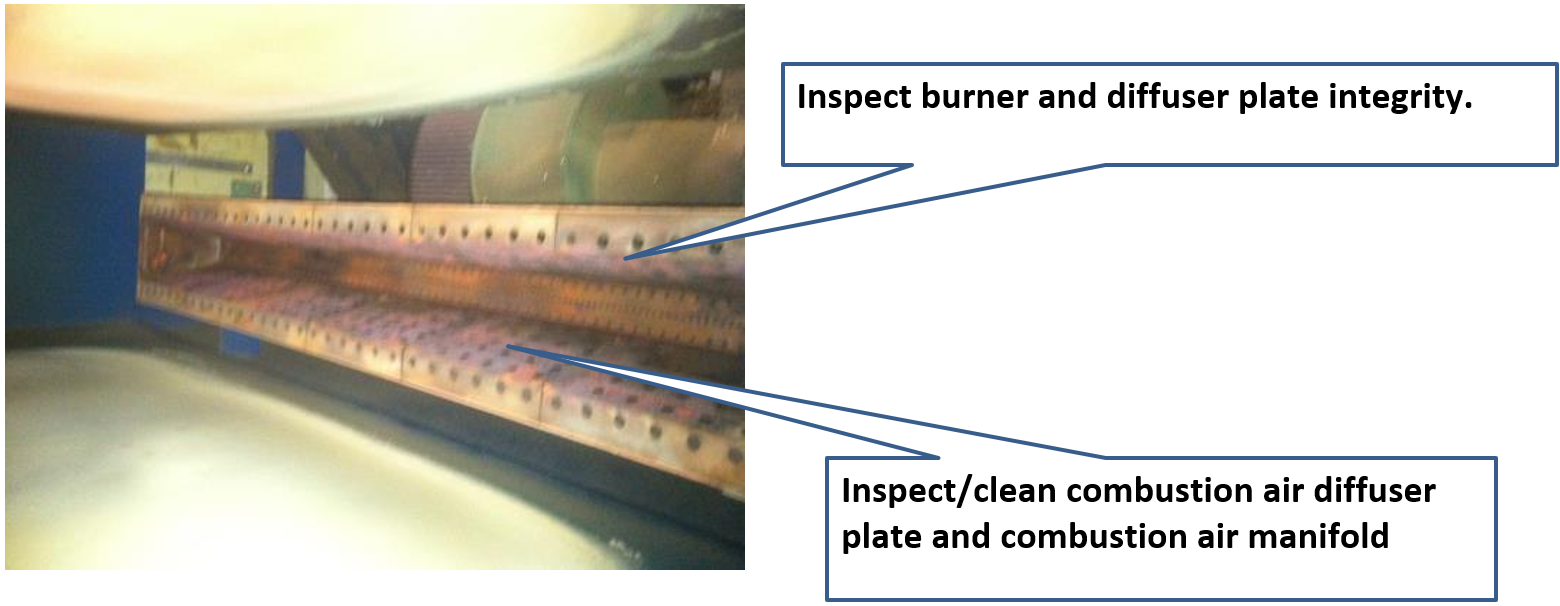
Check/Clean Burner and Combustion Air Manifold
Picture Before Cleaning
Add or drag pictures
Remove any accumulated lint from Manifold and diffuser plate.
Inspect burner and diffuser plate integrity
Picture After Cleaning
Add or drag pictures
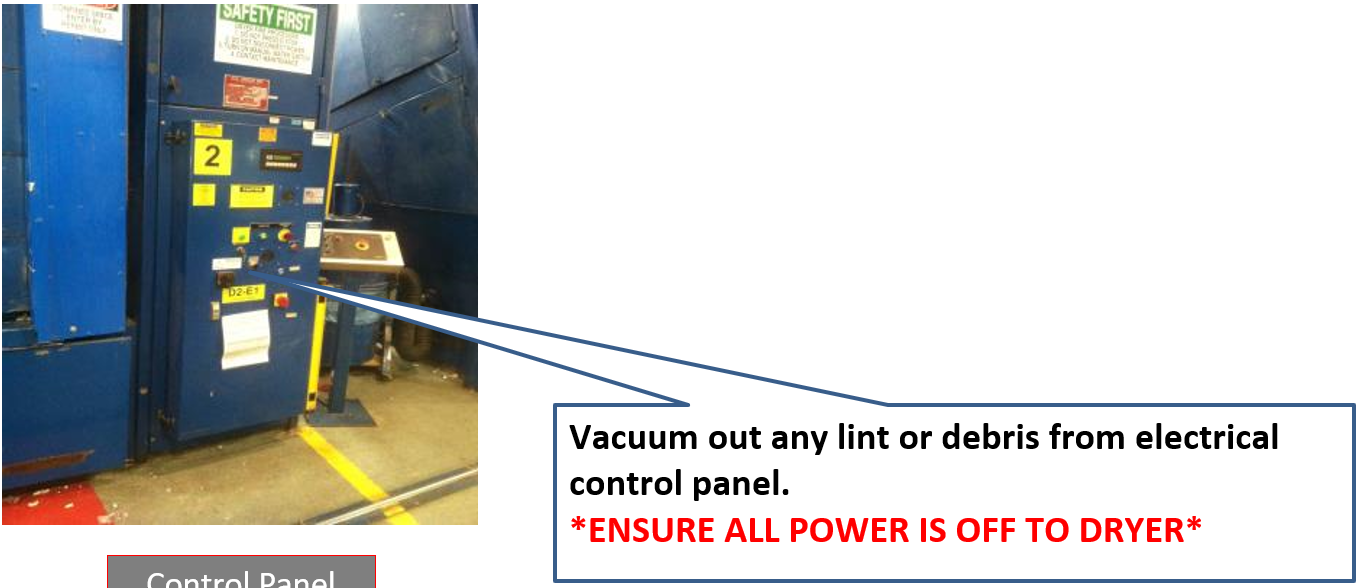
Vacuum out Control Panel
Picture Before Cleaning
Add or drag pictures
Vacuum out any lint or debris from electrical control panel.
Picture After Cleaning
Add or drag pictures
Clean Lint from Left/Right Side Dryer House
Picture Before Cleaning
Add or drag pictures
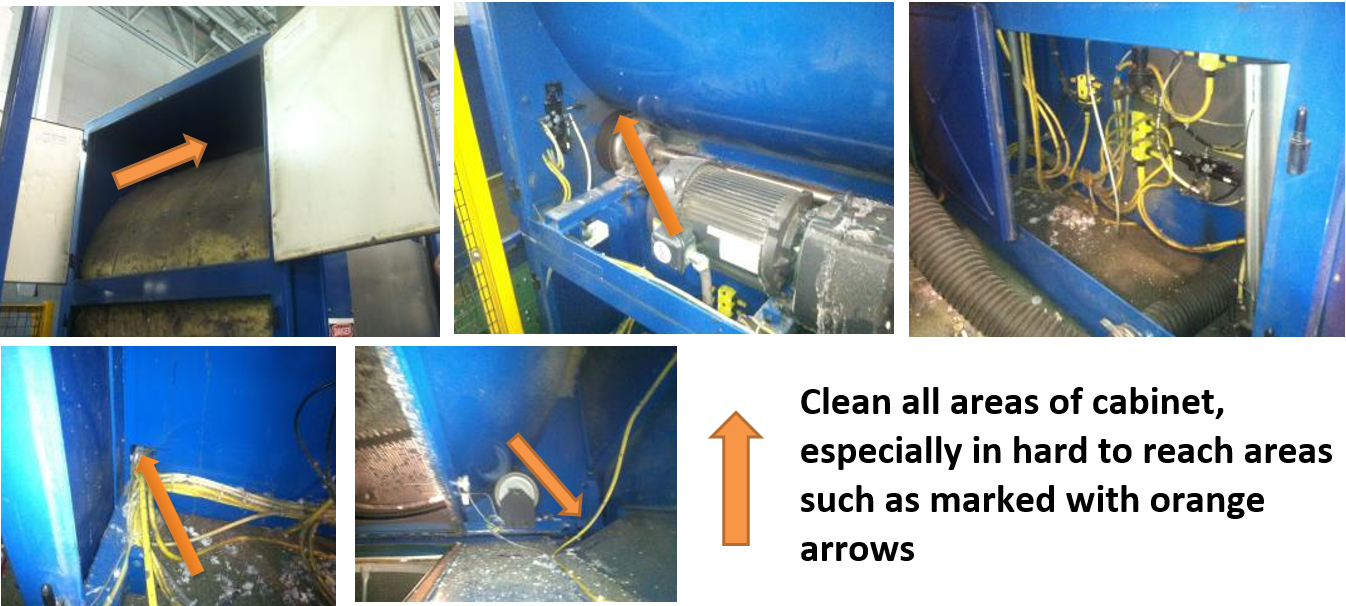
Open side panels and remove lint and debris.
Clean oil/grease from gearbox and motor.
Picture After Cleaning
Add or drag pictures
Clean Lint from Top of Dryer House
Picture Before Cleaning
Add or drag pictures
Clean lint and debris from top of dryer house.
Ensure all electrical connections and cover plates are in tact.
Remove top covers if proper cleaning was not accomplish through sides.
Picture After Cleaning
Add or drag pictures
Clean Debris from Dryer Drum
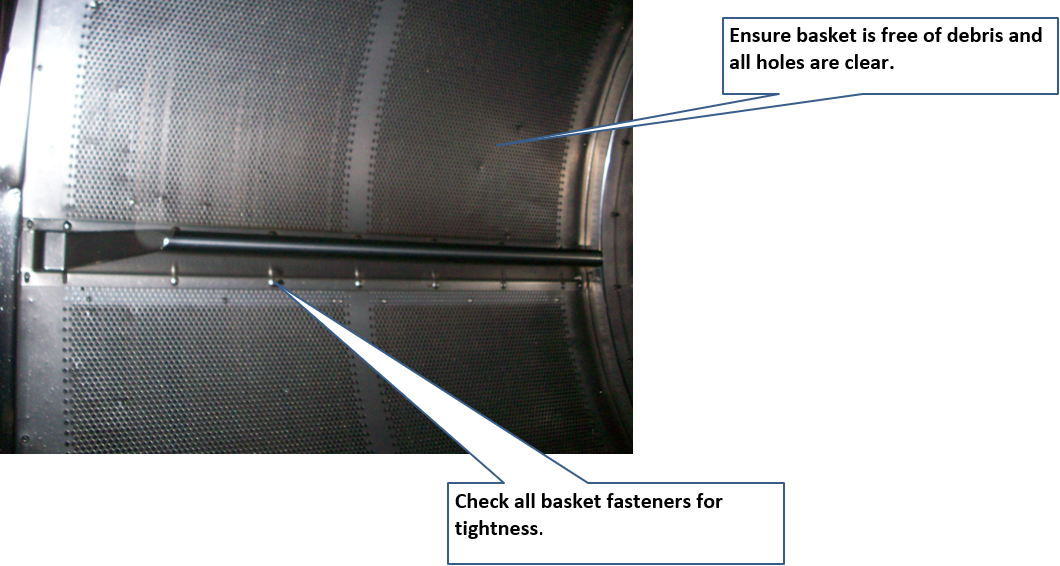
Ensure basket is free of debris and all holes are clear.
Check all basket fasteners for tightness.
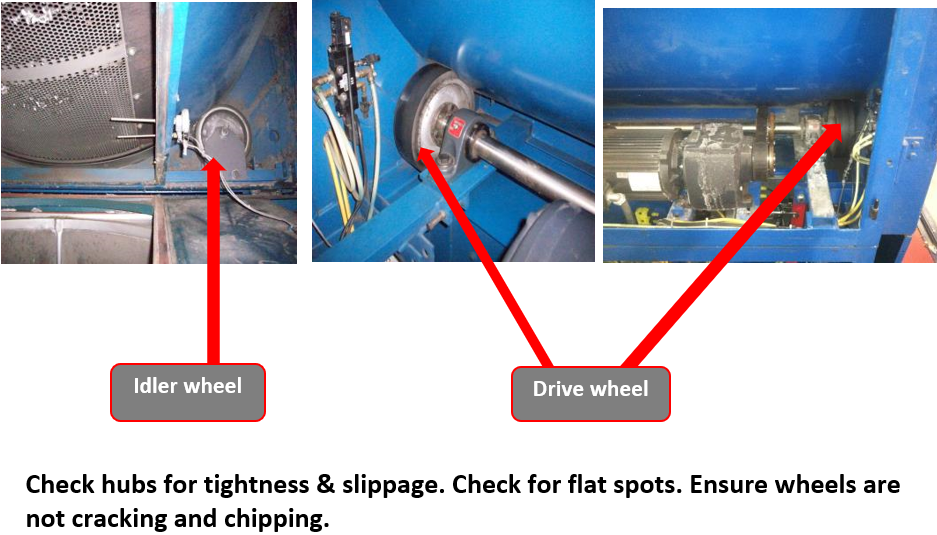
Idler and Drive wheels
Check hubs for tightness & slippage.
Check for flat spots.
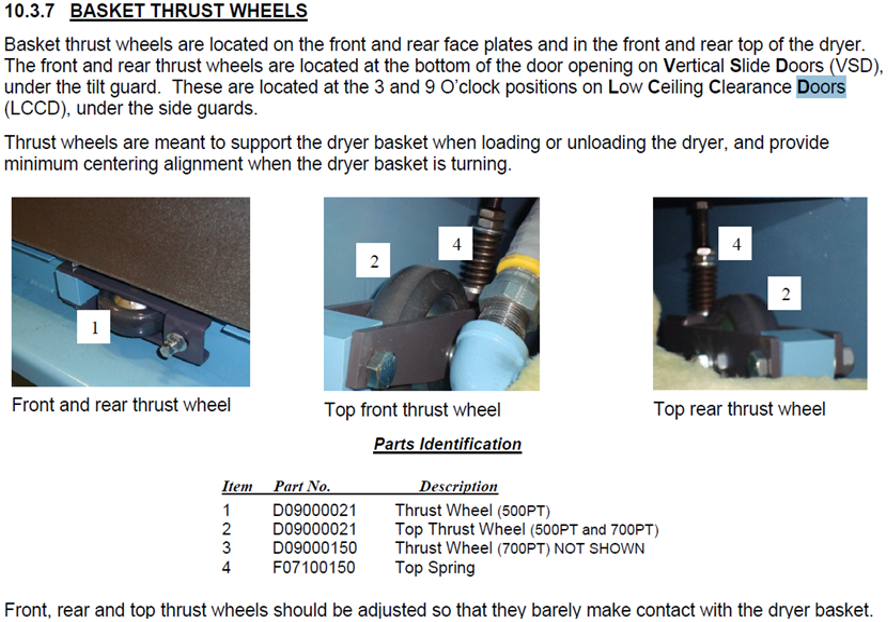
Thrust wheels
Check hubs for tightness & slippage.
Check for flat spots.
Seals
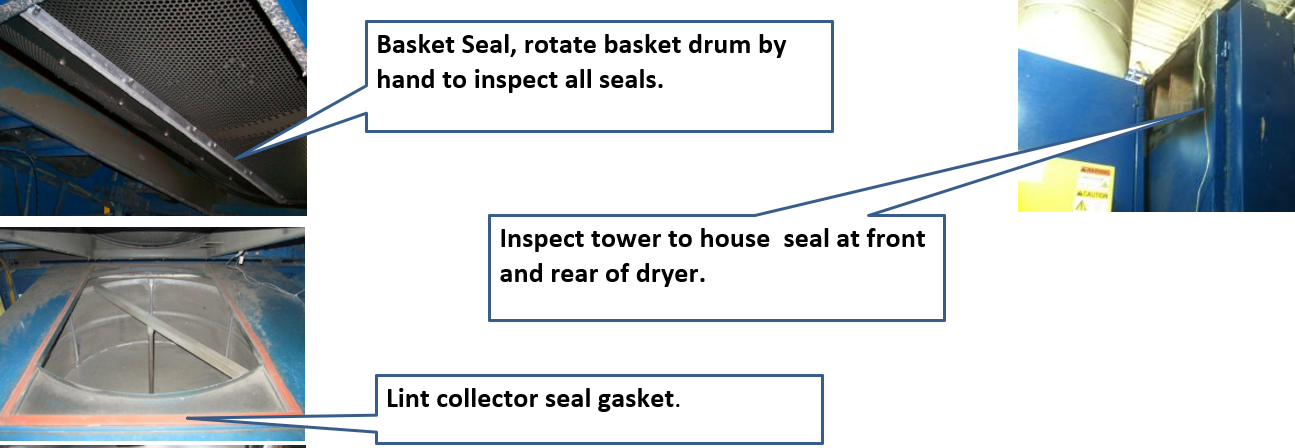
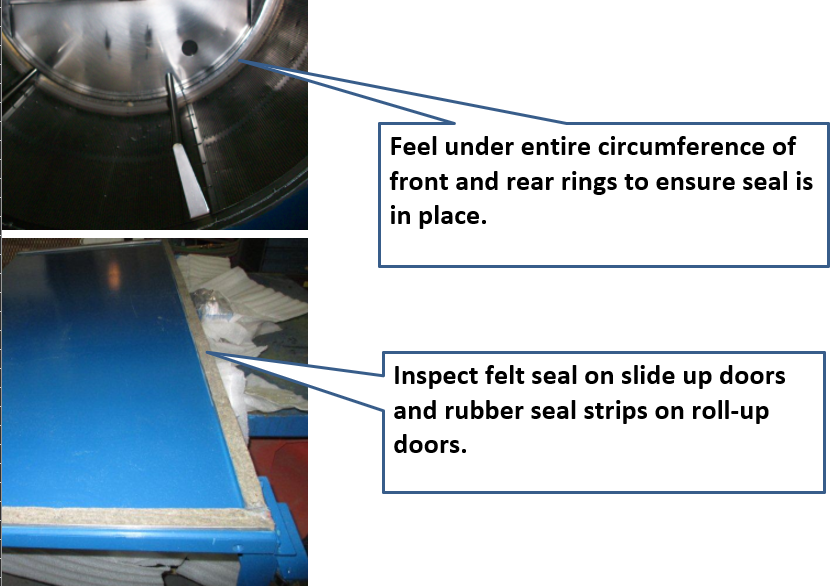
Check all seals for wear or damage, including basket wiper seals, door seals, tower seals and gap ring seals.
Drum Alignment
Drum must be aligned to prevent seal damage. Drum alignment is the process of ensuring the dryer drum and house weldment are concentric (share the same center axis).
Food Safety Post-Check
Source: 23K Justice IL - Cintas (Community Member)

