Back

Caterpillar TH360B Telehandler: Maintenance (Every 10 Service Hours or Daily)

This daily procedure provides the actual manual link for your backup alarm test, brakes, indicators and gauges test, etc. This will help your equipment maintain superior efficiency.
MaintainX
10/24/2021

Caterpillar TH360B Telehandler: Maintenance (Every 10 Service Hours or Daily)

This daily procedure provides the actual manual link for your backup alarm test, brakes, indicators and gauges test, etc. This will help your equipment maintain superior efficiency.

    Backup Alarm - Test

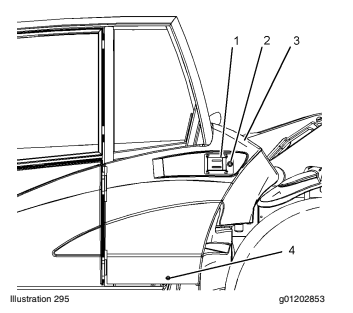
    The backup alarm is mounted at the rear of the machine.

    Turn the engine start switch to the ON position in order to perform the test.

    Apply the service brake. Move the transmission control lever to the REVERSE position.

    The backup alarm should start to sound immediately. The backup alarm will continue to sound until the transmission control lever is moved to the NEUTRAL position or to the FORWARD position.

    The backup alarm has one sound level. The sound level is not adjustable.

    Braking System - Test

    Service Brake

    Check the area around the machine. Make sure that the area is clear of personnel and obstacles.

    Check the brakes on a dry, level surface. Fasten the seat belt before you check the brakes.

    The following procedure is used in order to determine if the service brake is functional. This procedure is not intended to measure the maximum brake performance. The brake holding torque that is required to sustain an engine torque at a specific engine rpm varies depending on the machine configuration. The variations are the differences in the engine setting, in the power train efficiency, and in the brake holding ability, etc.

    Test Procedure

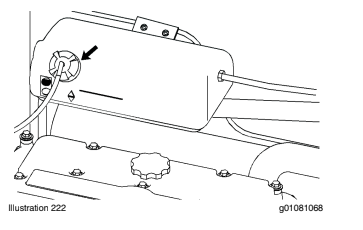
    Cooling System Coolant Level - Check

    NOTICE: Always use a designated pump for oil sampling, and use a separate designated pump for coolant sampling. Using the same pump for both types of samples may contaminate the samples that are being drawn. This contaminate may cause a false analysis and an incorrect interpretation that could lead to concerns by both dealers and customers.

    Illustration 222

    • Screenshot2021-02-09at7.32.33AM.png

    Engine Oil Level - Check

    ! WARNING

    Hot oil and hot components can cause personal injury. Do not allow hot oil or hot components to contact skin.

    NOTICE: Do not under fill or overfill engine crankcase with oil. Either condition can cause engine damage.

    Park the machine on level ground.

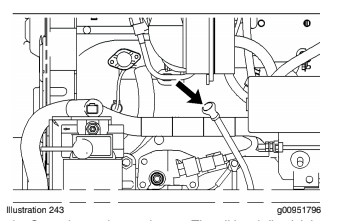
    Check the crankcase oil level with the machine level. If the machine has just been stopped, wait for a minimum of one minute. The minute will allow oil to drain back into the crankcase.

    Illustration 243

    • Screenshot2021-02-09at7.43.09AM.png

    Illustration 244

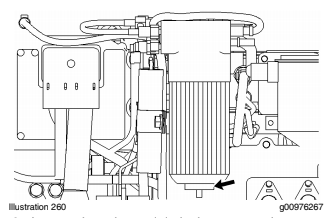
    Fuel System Water Separator - Drain

    ! WARNING

    Personal injury or death may result from failure to adhere to the following procedures.

    Fuel leaked or spilled onto hot surfaces or electrical components can cause a fire.

    Clean up all leaked or spilled fuel. Do not smoke while working on the fuel system.

    Turn the disconnect switch OFF or disconnect the battery when changing fuel filters.

    NOTICE: Care must be taken to ensure that fluids are contained during performance of inspection, maintenance, testing, adjusting and repair of the product. Be prepared to collect the fluid with suitable containers before opening any compartment or disassembling any component containing fluids.

    Dispose of all fluids according to local regulations and mandates.

    • Screenshot2021-02-09at7.48.25AM.png

    Fuel Tank Water and Sediment - Drain

    ! WARNING

    Personal injury or death may result from failure to adhere to the following procedures.

    Fuel leaked or spilled onto hot surfaces or electrical components can cause a fire.

    Clean up all leaked or spilled fuel. Do not smoke while working on the fuel system.

    Turn the disconnect switch OFF or disconnect the battery when changing fuel filters.

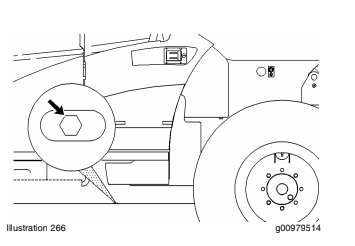
    The fuel tank drain plug is located on the bottom of the fuel tank.

    • Screenshot2021-02-09at7.50.19AM.png

    Indicators and Gauges - Test

    Check for broken indicator lights, broken switches or broken lenses on the instrument panel gauges.

    Start the engine. Run the engine until the instrument panel gauges have stabilized. Check that the instrument panel gauges are operating correctly.

    Stop the engine and perform any necessary repairs before the machine is operated.

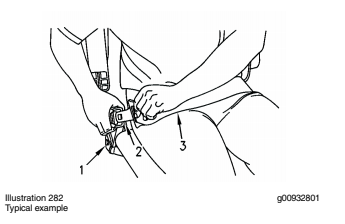
    Seat Belt - Inspect

    • Screenshot2021-02-09at8.35.38AM.png

    Note: Within three years of the date of installation or within five years of the date of manufacture, replace the seat belt. Replace the seat belt at the date which occurs first. A date label for determining the age of the seat belt is attached to the seat belt, the seat belt buckle, and the seat belt retractor.

    If your machine is equipped with a seat belt extension, also perform this inspection procedure for the seat belt extension.

    Tire Inflation - Check

    ! WARNING

    Personal injury can result from improper tire inflation.

    A tire blowout or rim failure can result from improper or misused equipment.

    Use a self-inflating chuck and stand behind the tread when inflating a tire.

    Proper inflating equipment, and training in using the equipment, are necessary to avoid overinflating.

    Before inflating tire, put the tire in a restraining device.

    Some machines are equipped with tires that are filled with air. Other machines are equipped with tires that are filled with foam. Pressures of tires that are filled with air must be checked. Pressures of tires that are filled with foam do not require checking.

    Consult your Caterpillar Dealer for further information on the correct operating pressures and the correct load ratings.

    Transmission and Hydraulic System Oil Level - Check

    Before you check the level of the hydraulic oil, perform the following procedures:

    • Screenshot2021-02-09at8.43.22AM.png
    • Screenshot2021-02-09at8.43.54AM.png

    Note: Run the machine for at least five minutes in order to pressurize the hydraulic system.

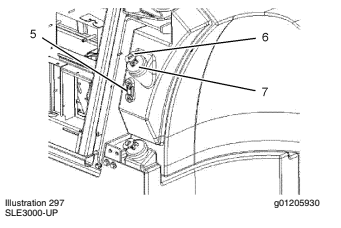
    You should look at oil level gauge (5) in order to check the level of oil in the hydraulic system. The oil level of the hydraulic system is correct when the oil level has reached the line that is marked "MAX" or if the oil level is halfway between the red line and the blue line on the oil level gauge. If necessary, add Caterpillar TDTO to the correct oil level by the following method:

    Wheel Nut Torque - Check

    Check the wheel nut torque on new wheels and on repaired wheels after every ten service hours until the specified torque is maintained.

    Tighten the wheel nuts to a torque of 460 ± 60 Nm (340 ± 45 lb ft). When you install new wheels or repaired wheels, apply one drop of lubricating oil to the threads before you install the wheel nuts and the washers.

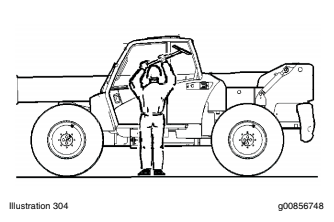
    Windows - Clean

    • Screenshot2021-02-09at8.49.43AM.png

    Work Tool - Inspect/Replace

    In order to help minimize unexpected, costly repairs and downtime, inspections need to be carried out on a regular basis. The interval between the inspections depends on the age of the work tool and the severity of the operating conditions.

    More frequent inspections will be required of older work tools and work tools that are used in particularly severe operating conditions.

    To perform a proper inspection, the work tool must be thoroughly cleaned. It is impossible to inspect the work tool properly if the work tool is dirty.

    Early detection and repair of faults will ensure continued operation of the work tool. Also, early detection and repair will improve the availability of the work tool. Repair of faults will also reduce the risk of accidents.

    The work tool should only be repaired by a qualified Caterpillar dealer in accordance with the manufacturers recommendations. However, if you decide to carry out your own repairs, consult your Caterpillar dealer for the recommended repair techniques.

    Inspect the work tool before the work tool is attached to the machine.

Please note that any procedure, checklist, or other document available in the MaintainX Procedure Hub is provided for general education and information only and does not constitute legal, medical, or financial advice. MaintainX makes the materials available AS IS and AS PROVIDED, without warranties of any kind. By downloading or using any such materials, you assume the risk that they may not be appropriate for your specific situation and agree that you are solely responsible for any such use, including compliance with applicable law and with meeting any conditions of product warranties.